Lore · Maps · seed 1006 · HUGE · 256
Grey Front
The war map: a 2 km front where the blocs' grids meet. Whoever holds it at the end of the month holds the season.
Domination (8 sectors, the war map) · holds season leader (S1: MERIDIAN) · attacks challenger (S1: HALCYON) · continental, late autumn
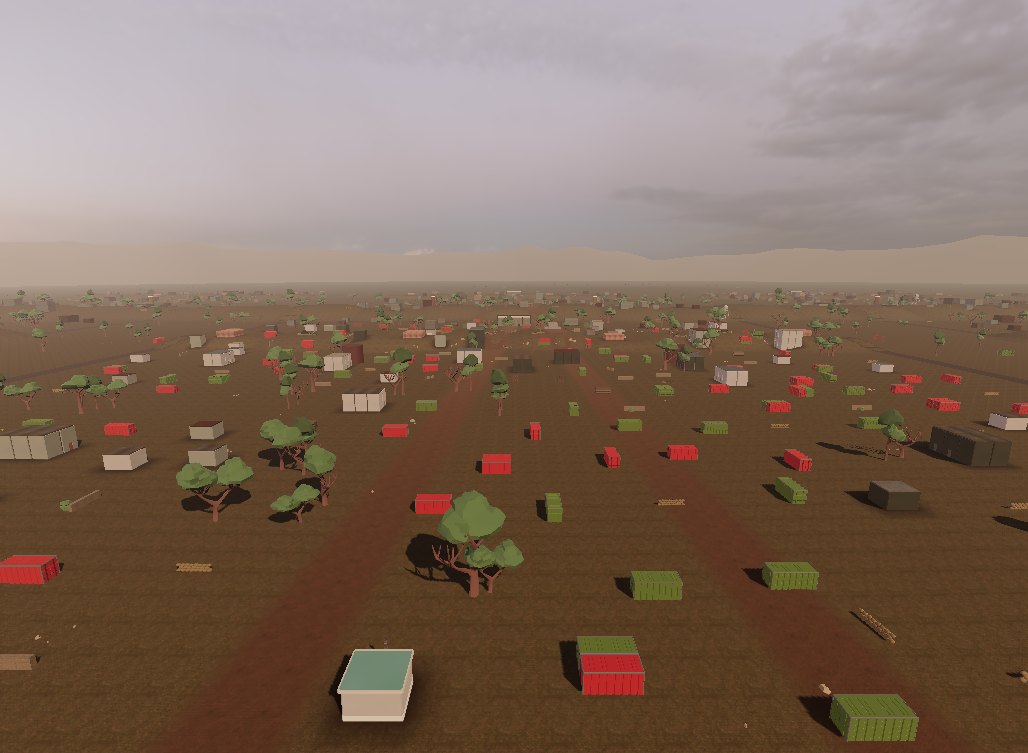
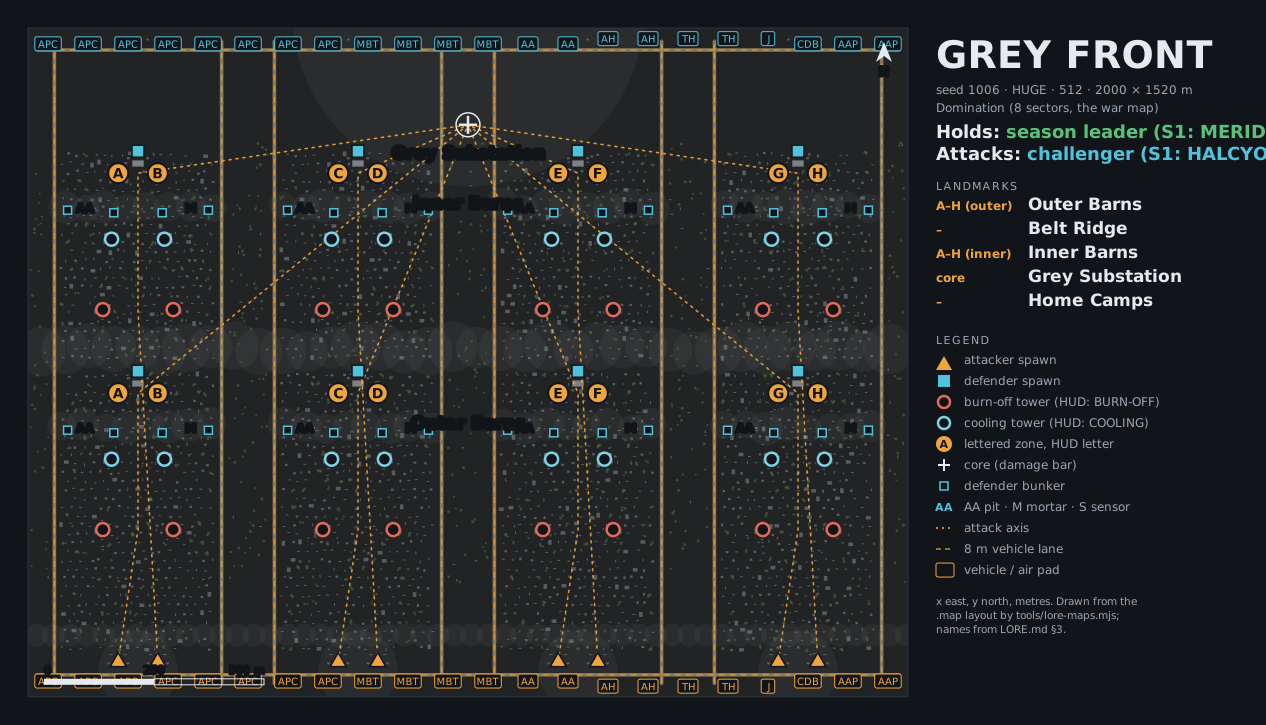
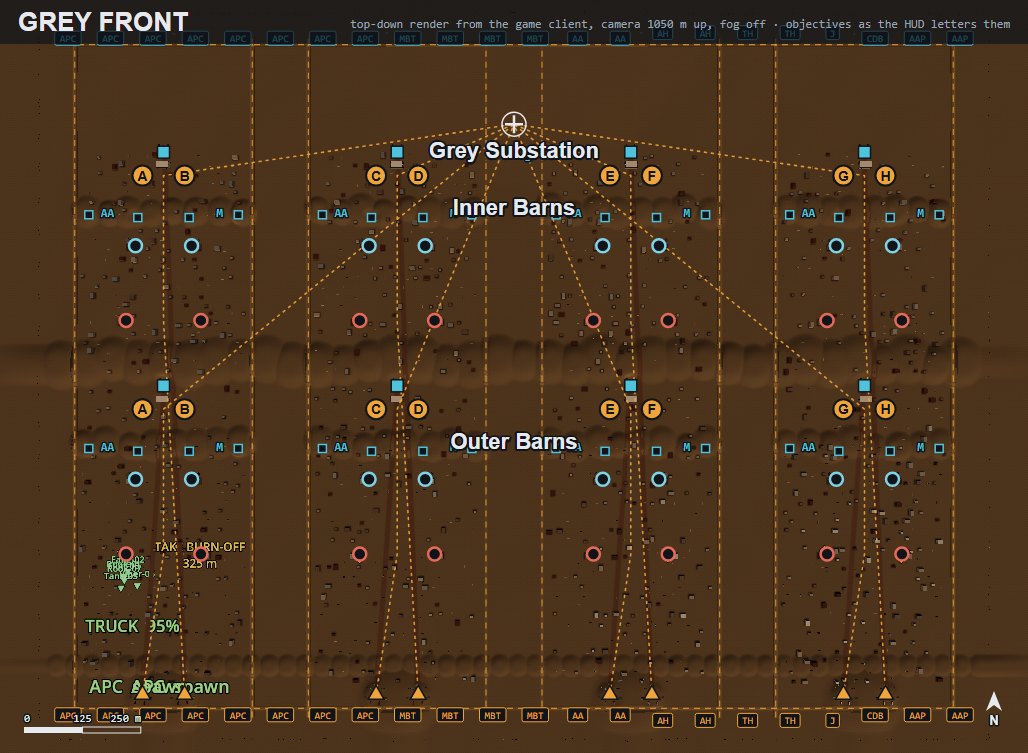
- Size tier: HUGE: 8 sectors, 512 players (256 v 256), 2000 × 1520 m. Generated by
gen-front.mjs(mapsbranch), the 8-sector layout ofDESIGN.md§20.5. - Modes: Domination across two belts of four sectors (outer belt S1–S4, inner belt S5–S8). The war map of
DESIGN.md§11: the only map whose result moves map ownership. - Region and climate: the grey zone, a contested lowland where the three blocs' power grids meet: farmland, drainage canals, industrial villages and server barns strung along a high-voltage corridor. Continental, late autumn.
- Time and weather: a flat grey day under low cloud, drizzle, smoke from burning server barns on every horizon.
- Holds / attacks: the season's leader holds it, the challenger with the best weekly record attacks. Season 1 opens with MERIDIAN dug in and HALCYON attacking.
- Why it matters: the corridor's substations feed everyone's clusters. Win the Grey Front and the season's map of who holds what is redrawn in your colour.
- Vehicles: the full combined-arms roster per side: 16 trucks, 8 APCs, 4 MBTs, 2 mobile AA, 2 attack and 2 transport helicopters, an attack jet and the counter-drone battery (pads in both home camps).
- Palette and sky: mud
#4F473C, dead grass#8F8466, concrete#9A9A94, smoke grey#94938E, wet asphalt#2E3033, fire orange#D9692E. Sky: low overcast (overcast_soil_puresky), a darker grade, smoke columns. - Soundscape: constant far artillery, jets passing high, rain on the fields, transformer hum, burning barns crackling, wind across open ground, sirens a long way off.
- Music: MAP-1006 "Grey Front", 126 BPM, total war: all three PMC motifs collide; relentless, huge, a little desperate.
- Map note: the HUD letters wrap at eight, so the inner belt repeats A–H (
objective.rsLABELS). Call them outer A–H and inner A–H on the radio until the HUD tells them apart.
Landmarks
| Objective (HUD) | Landmark | What it is |
|---|---|---|
| A–H (outer) | Outer Barns | The four outer-belt server barns, S1–S4, lettered zones at y ≈ 690. |
| – | Belt Ridge | The long rise between the belts (y ≈ 790): the APC crossing and the big fight once the outer belt falls. |
| A–H (inner) | Inner Barns | The four inner-belt barns, S5–S8, lettered zones at y ≈ 1190. |
| core | Grey Substation | The high-voltage substation (1000, 1300) that feeds the corridor, with the defenders' sensor mast beside it (1030, 1230). |
| – | Home Camps | Attackers south (camp road y ≈ 50), defenders north (y ≈ 1470): vehicle and aircraft pads, AA gun pits, the counter-drone battery. |
Lanes and where the fights happen
- Every sector has an infantry centre and two 8 m flank roads (x = 60, 440, 560, 940, 1060, 1440, 1560, 1940): the armour fights on the roads, the infantry between them, the air above.
- Platoons 1–4 open on the outer belt; platoons 5–8 ride the APCs up to the inner belt as it opens.
- The Belt Ridge and the inner bunker rows (y ≈ 1100) are the war's choke; the Grey Substation is the last stand.
Layout data: sectors, objectives, records → · Music cues →
last built 2026-10-26 from 2dba433 · generated by tools/wiki-build.mjs · BF4 numbers are observed reference values read into clean-room notes; no BF4 code, data file or asset is on this site · OpenMAG values are proposed until playtests confirm them · OpenMAG home